Zomom is the second member of the Deadly Six and is one of the bosses in the Wii U and Nintendo 3DS versions of Sonic Lost World. He is fought in Zone 2 and 4 of Desert Ruins as the stage's boss, and is also re-fought during a boss gauntlet alongside Zazz and Master Zik in Lava Mountain Zone 1 in the Wii U version of the game, and is fought in the Boss Act of Desert Ruins in the 3DS version.
Battle
Desert Ruins Zone 2 (Wii U)
The first battle against Zomom takes place atop a large totem-like face made of tiles at the end of Desert Ruins Zone 2. At the beginning of the battle, Zomom will start off by stomping the totem head to send it into freefall; knocking the player away. From there the player has to skydive after the totem head to catch up, but caution must be taken as it will start spawning giant spike balls that will damage the player if Sonic makes contact with them. The spike balls are easily avoided, though.
Once the player catches up to and lands on the totem head, Zomom will begin jumping up and stomping the sides; causing it to rotate. The player needs to run against the rotation to get to the safe surface on the other side or risk falling into a bottomless pit. From there, Zomom will then belly-flop in to try and land on the player, but he can be avoided simply by staying away from him as he falls. After that, Zomom will be dazed for a moment afterwards, which is where he is vulnerable to the player's attack. To deal maximum damage, the player should lock onto Zomom multiple times and use the Homing Attack.
After taking enough damage, Zomom will cause the totem head to free-fall once more. The strategy remains the same as before, but this time the tiles that make up the Totem Head will break away to reveal a second head inside that has a much narrower surface; thus requiring the player be more precise when aiming for it. It will also fire an additional spike ball at Sonic.
After the player lands on the totem head, Zomom will stomp on the sides again to rotate it, though this time he will do it anywhere from two to three times. Once again, the player has to move against the rotation to get to the safe surface on the other side or risk falling into a bottomless pit, and wait for Zomom to belly flop once more. After that, Zomom will be left dazed once more and be vulnerable to the player's attack again. A single Homing Attack at this point is all that's needed to defeat Zomom and end the fight.
Nightmare Zone (Wii U)

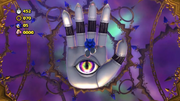
Zomom on Wizeman's hand in the Nightmare Zone
In the Nightmare Zone, Zomom is fought in a battle similar to his fight in Desert Ruins Zone 2, but the totem head is replaced by one of the hands of Wizeman. Instead of a spike ball, it will fire a blue energy orb. Sonic needs to simply land on the hand to end the fight.
Desert Ruins Zone 4 (Wii U)
Zomom is fought a second time at the end of the second sand tornado section of Desert Ruins Zone 4. The fight starts out with the overweight Zeti hopping up and down from one side of the screen to the other. When landing from the third jump, Zomom will stomp the ground hard enough to cause an earthquake and a shockwave. If Sonic is on the ground when this happens, he will be stunned and left vulnerable, so the player should jump just before Zomom lands to avoid this.
When landing after the third jump, Zomom will remain idle for a few moments and vulnerable to the player's Homing Attack. You can multi-lock Sonic's homing attack for a more devastating hit, but Zomom will not stay idle for long, so it is not recommended to do this. After that, Zomom will repeat the same process as before.
After hitting Zomom enough times, he will burrow underground to escape; leaving a Yellow Wisp capsule behind. The player has to use it to transform into the Yellow Drill and drill after Zomom. Don't worry if he gets away, though, as there are trails of Rings underground that will guide the player in the proper direction.
Reaching the end of this section, the player will come out in a new area with the destroyed totem head in the background. There, Zomom creates a sand tornado that is pulling and dropping the tiles from the destroyed Totem Head to box the player in a closed area. Take note not to venture too far to one side of the screen as the tiles fall, as they can and WILL crush the player if Sonic gets caught underneath them.
For the second phase of the battle, Zomom will spin rapidly around to turn himself into a small sand tornado, and then move towards the player to strike them. In this state, Zomom cannot be harmed & is slightly too tall to jump over normally. To avoid his attack, the player will need to Parkour up the walls on either side to get the height needed to vault over him.
When he stops spinning, Zomom will be dazed for a moment and vulnerable to the player's attacks. After being attacked, Zomom will start spinning again and repeat the earlier process, except that he creates a bigger tornado that is harder to vault over, but moves slower. Once he stops spinning, Zomom will be dazed for a moment and vulnerable to the player's attacks. The player then has to attack again a few more times with the Homing Attack to end the fight.
Desert Ruins Boss (3DS)
The 3DS version of Zomom's boss battle takes place on a large planetoid covered in Tile Blocks. Zomom is riding atop a Totem Head Mech.
During the battle, the Totem Head Mech's strategy is bouncing after the player and launching fireballs from its mouth that will home in on the player for a short while. The Totem Head Mech can be easy to avoid, though, and the fireballs can also be avoided if the player keeps moving.
To deal damage to the Totem Head Mech, the player has to get behind it and use the Homing Attack to attack the crystal on the back of it. However, the Tile Blocks on the planetoid, while not hurting the player upon contact, can draw the player's Homing Attack away from the Totem Head Mech's crystal. Destroying them will get rid of them for a short time, but they will re-spawn as time goes on, so it is recommended that the player focuses on attacking the Totem Head Mech.
When Zomom says "Oh, you're the worst snack EVER!", Totem Head Mech will rush at the player and fall down on its back where it will fire off a large volley of fireballs in the sky. These fireballs will home in on the player, though most will probably be blocked by the Totem Head Mech as they circle around to hit the player. After this attack, though, Zomom and the Totem Head Mech will be tired out, leaving them vulnerable to the player's attacks and allowing the player to deal a large amount of damage to Zomom.
After attacking the Totem Head Mech several times, chipping away the face of Totem Head Mech while at it, it is destroyed, leaving Zomom to fend for himself. While on his own, Zomom will attack the player by dashing at the player with his arms flailing out, but it is relatively easy to avoid him. After then attacking with a maximum of six Homing Attacks, Zomom will be defeated.
It should be noted that the player can get the Indigo Asteroid Color Power in this boss battle. The player can use it to suck up the Tile Blocks so that the player can deal massive damage to the Totem Head Mech. This Color Power also allows the player to knock Zomom out with one hit after the Totem Head Mech is destroyed.
Videos


Gallery
Zone Two (Wii U)
| Gallery |
|---|
") Zomon at Desert Ruins Act Two. ") ") ") |
Zone Four (Wii U)
| Gallery |
|---|
") ") Zomon spinning to hit Sonic. ") ") |
Zone One (3DS)
")
")